H0 loc depot
For displaying and photographing the models I am creating in paper, I wanted to have an h0 railway module to put the models in a realistic setting. This is the second part of building the layout describing the groundwork and building of the coal bunker.
The basic ground work
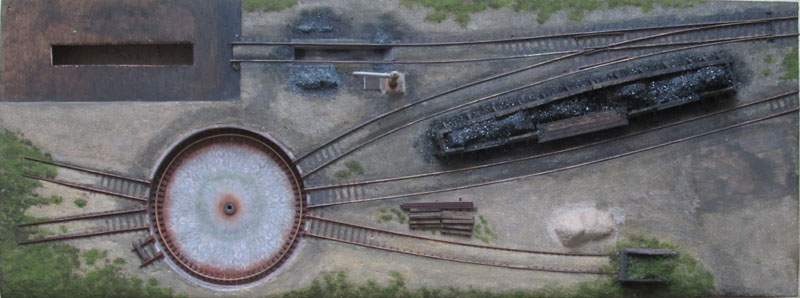
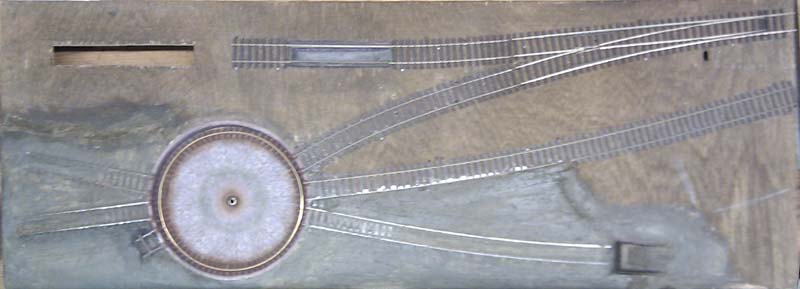 After creating the baseboard and installing the roundtable pit the trackwork was layed down. I used Tillig flex trackwork and a Tillig turnout.
At the top left part of the above image
an ash pit and a maintanance pit is created. In the lower part of the image the tracks are already covered in a chalk with white glue.
I added some brown pigment to the mixture to give it a ground color. In Holland a lot of tracks were laid down in sharp yellow sand in stead of the
modern gravel. Thats why I used a different technique for ballasting. With most of the trackwork only the rails were left uncovered.
The sleepers were mostly covered as is the outside of the rail. Exceptions are the turnouts which were less covered to ensure an error free operation.
After creating the baseboard and installing the roundtable pit the trackwork was layed down. I used Tillig flex trackwork and a Tillig turnout.
At the top left part of the above image
an ash pit and a maintanance pit is created. In the lower part of the image the tracks are already covered in a chalk with white glue.
I added some brown pigment to the mixture to give it a ground color. In Holland a lot of tracks were laid down in sharp yellow sand in stead of the
modern gravel. Thats why I used a different technique for ballasting. With most of the trackwork only the rails were left uncovered.
The sleepers were mostly covered as is the outside of the rail. Exceptions are the turnouts which were less covered to ensure an error free operation.
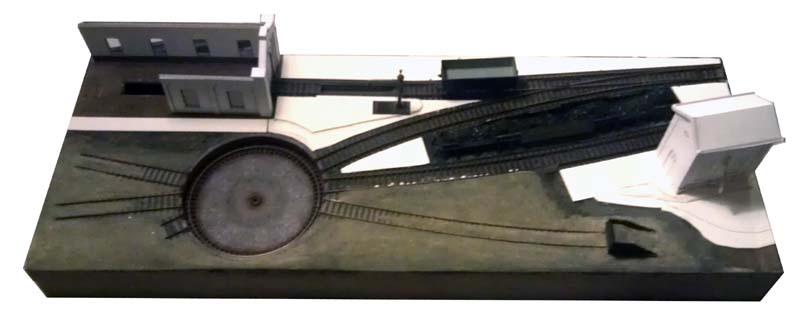 In this picture the top level is prepared for ballasting with the chalk mixture.
I glued 2 mm cardboard to level the ground between the trackwork. Also the prototypes of the engine house and water house are visible.
In the lower part of the picture the trackwork is already given a layer of very fine sand.
In this picture the top level is prepared for ballasting with the chalk mixture.
I glued 2 mm cardboard to level the ground between the trackwork. Also the prototypes of the engine house and water house are visible.
In the lower part of the picture the trackwork is already given a layer of very fine sand.
 Then the chalk mixture was applied to the trackwork giving it the desired shape.
In this picture the coal bunker, which will be described next, is also integrated.
Then the chalk mixture was applied to the trackwork giving it the desired shape.
In this picture the coal bunker, which will be described next, is also integrated.
 After that the whole layout was coloured in a brownish color and covered with a layer of sand.
 I used diluted acrylic paint to weather the sand in areas around the coal bunker and ash pit as well as the walk ways.
 Some organic ground coverage was added around the edges of the layout.
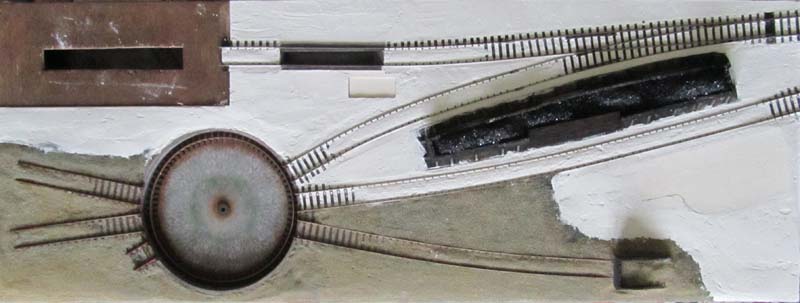
The coal bunker
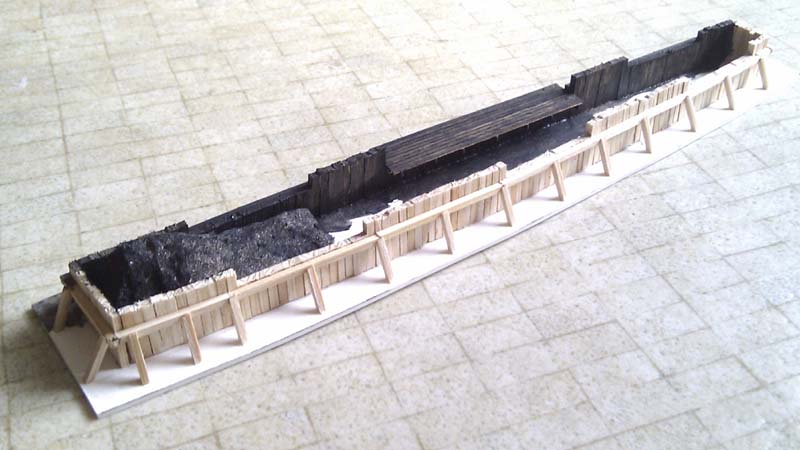
 The coal bunker is build in a way which was common
in the Netherlands. I used wood with the dimensions of railway sleepers cut with my bandsaw outoff an oak floorplank.
The walls are made in modules of about 12 sleepers which were then joined into the larger walls and glued to the 2mm cardboard base.
The dark brown was created using a mixture of deluted black and brown acrylic paint.
The rough shape of the coal was made by shaping some insulation with a knife and then painting it black.
The coal bunker is build in a way which was common
in the Netherlands. I used wood with the dimensions of railway sleepers cut with my bandsaw outoff an oak floorplank.
The walls are made in modules of about 12 sleepers which were then joined into the larger walls and glued to the 2mm cardboard base.
The dark brown was created using a mixture of deluted black and brown acrylic paint.
The rough shape of the coal was made by shaping some insulation with a knife and then painting it black.
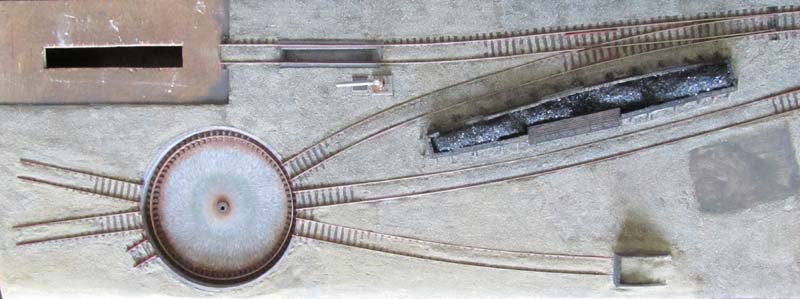
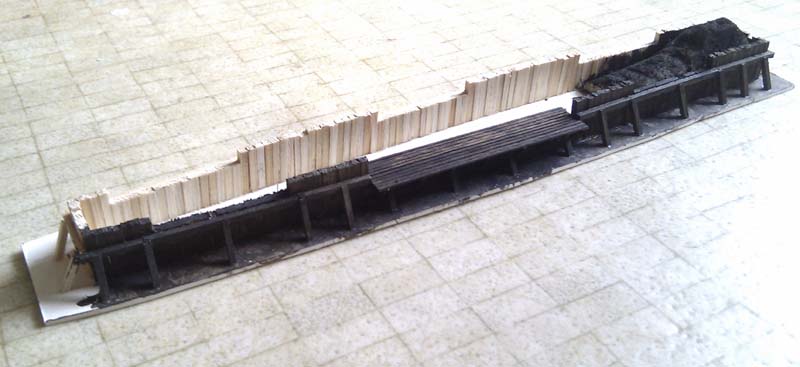
 Here the coal bunker is finished and placed between the trackwork and ready to be integrated into the layout.
The coal is real coal I had laying around for my coal burner. It was crushed and the larger pieces were used in the coal bunker.
I simply used deluted white glue to fix the coal to the bunker.
The dust particles and smaller pieces will be used around the coal bunker.
Here the coal bunker is finished and placed between the trackwork and ready to be integrated into the layout.
The coal is real coal I had laying around for my coal burner. It was crushed and the larger pieces were used in the coal bunker.
I simply used deluted white glue to fix the coal to the bunker.
The dust particles and smaller pieces will be used around the coal bunker.
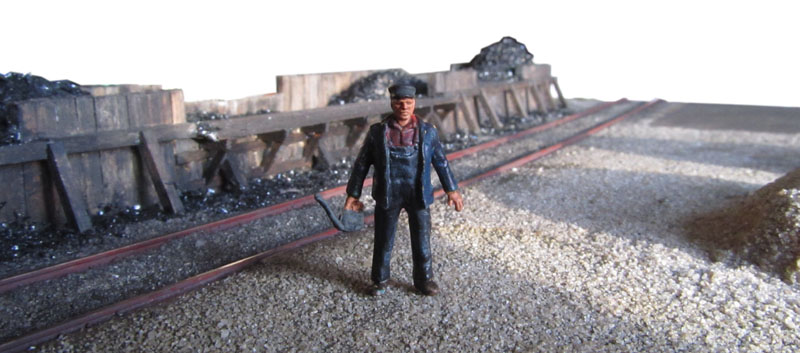
 This is a view of the coal bunker integrated in the layout.
At this stage the spilled coal is not put around the bunker yet.
Also visible is the paper model of the Backer and Reub tram loc.
This is a view of the coal bunker integrated in the layout.
At this stage the spilled coal is not put around the bunker yet.
Also visible is the paper model of the Backer and Reub tram loc.
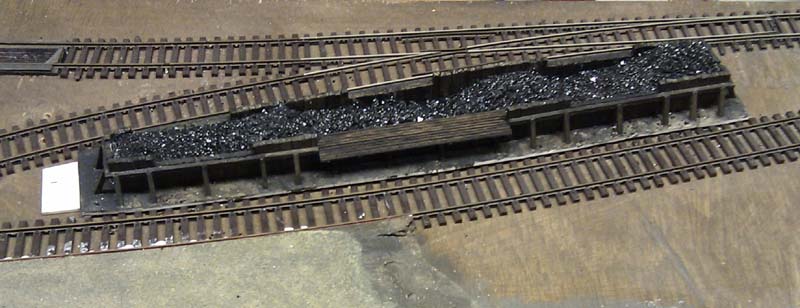
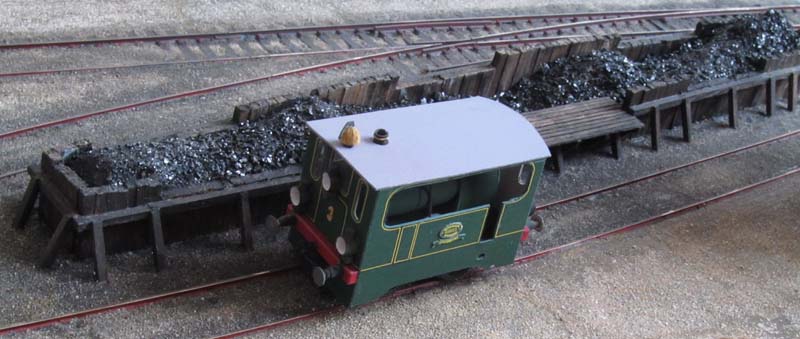
 This image shows the finished coal bunker with the spilled coal on and around the bunker.
 Also for the ash the coal is used. It is painted grey afterwards.
- www.schaalbouw.nl/projects © 2013 E.Paijmans
-

-

-
