5 Inch gauge railway wagon CHD (part 7)
This section will describe the making of the wagon body fittings. In line with the rest of the wagon the body fittings were home made. below the procedure to make these fittings to scale.
Making the required profiles.
 Its probably a lot easier to buy these strips but I found it hard to buy them locally with the right dimensions.....
so i decided to make them myself.
Its probably a lot easier to buy these strips but I found it hard to buy them locally with the right dimensions.....
so i decided to make them myself.
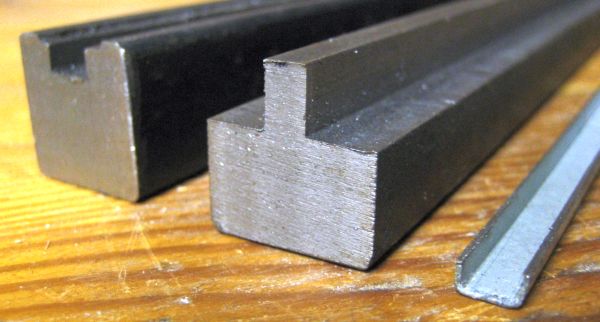
The wagon side profiles were pressed using a steel template.
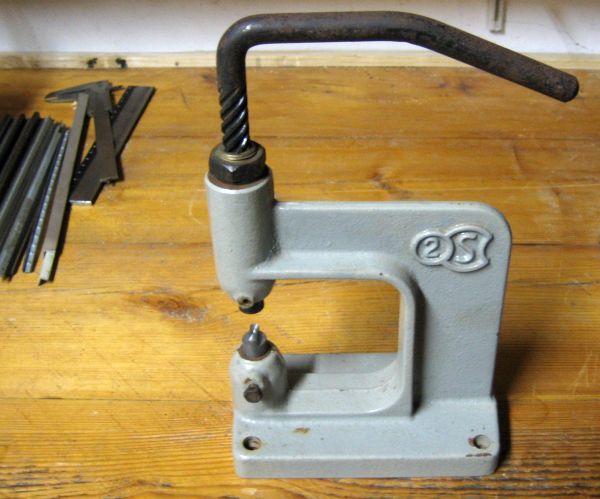
The press is a simple workshop press I made myself.
I milled these templates outoff mild steel (20x20mm stock).
As can be seen in the picture the left template has a little indent to center the strip before pressing.
after a bit of trial and error the profiles came out straigt and with around 90 degree angles.
the strips used are cut outoff 0,7 mm mild steel plates used for restoring car bodywork. They have a zinc coating.
 In an attempt to emboss the fixing bolds directly into the strips I made a little pressing fixture.
This was not very successful in that it was hard to get an even result and the strip did not stay straight.
Therefor this method was not further explored and a different way of preparing the strips was used.
In an attempt to emboss the fixing bolds directly into the strips I made a little pressing fixture.
This was not very successful in that it was hard to get an even result and the strip did not stay straight.
Therefor this method was not further explored and a different way of preparing the strips was used.
An embossed strip can be seen in the background on the left.
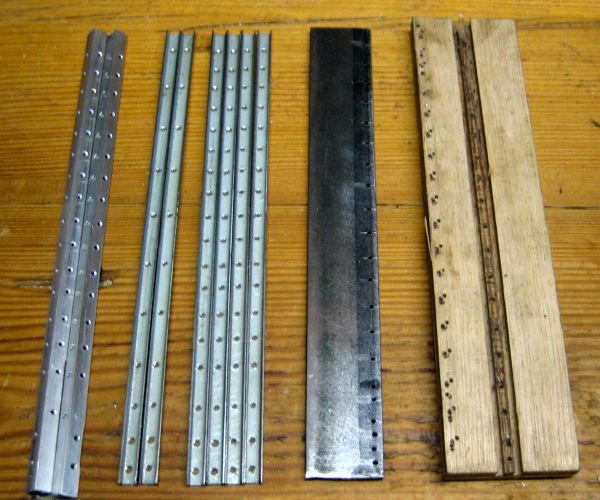 This time the strips were drilled at regular intervals.
For this to do consistantly a metal boring template was made outoff mild steel strip.
Also a wooden strip fixture was made to simplify holding the strip alligned when drilling.
The resulting strips are shown in the picture.
This time the strips were drilled at regular intervals.
For this to do consistantly a metal boring template was made outoff mild steel strip.
Also a wooden strip fixture was made to simplify holding the strip alligned when drilling.
The resulting strips are shown in the picture.
On the left of the picture the corner profiles can also be seen. These strips were made outoff widely available
aluminium 10x10mm angle profiles. The corner is reduced to 8x8 mm on the milling machine to better fit the wagon dimensions.
They are also drilled with the drilling template.
The strips will be fixed using the same brass nails as also used for the underframe rivets.
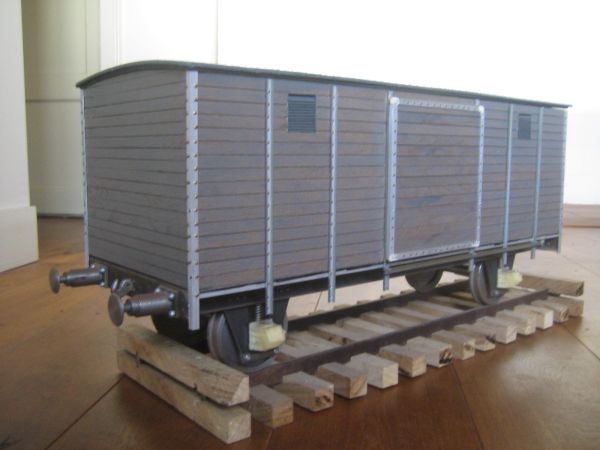 The strips are attached to the wagon body with epoxy glue and the brass nails.
Underneath the door the door rail is visible.
This rail is made from a steel curtain rail which is cut in half and reduced in size.
The strips are attached to the wagon body with epoxy glue and the brass nails.
Underneath the door the door rail is visible.
This rail is made from a steel curtain rail which is cut in half and reduced in size.
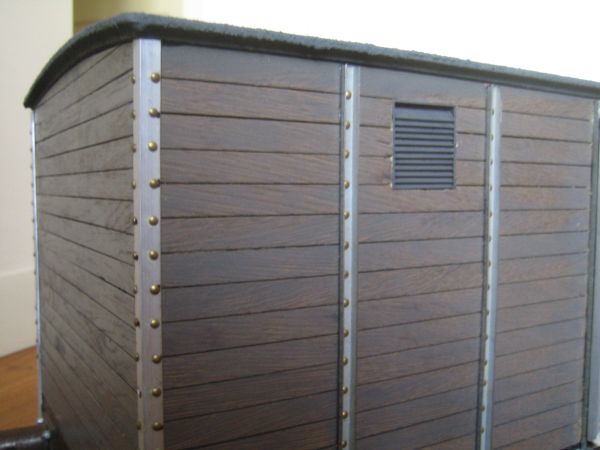 Here a detail of all the nails being driven into the wood. Note that the nails are always driven in between the planks.
Back to CHD part 6 of the build. or to the next chapter CHD part 8 of the build.
- www.schaalbouw.nl/projects © 2013 E.Paijmans
-

-

-
