5 Inch gauge railway wagon CHD (part 6)
This section will describe the making of the wagon body.
Making of the wagon body.
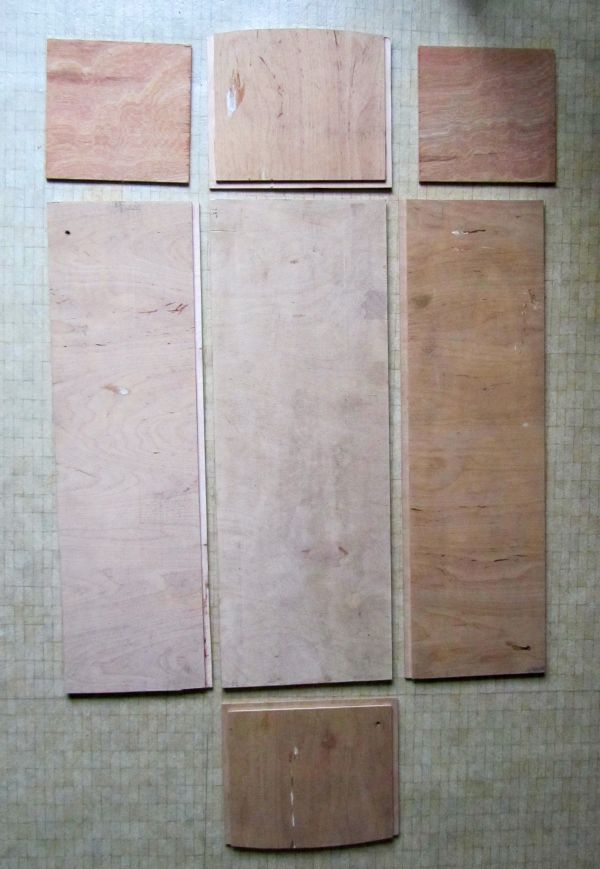 Next a plywood box is made to form the body part of the wagon.
Exteriour plywood was choosen for stability and resistance to moisture.
This picture shows the plywood part for body of the wagon.
Next a plywood box is made to form the body part of the wagon.
Exteriour plywood was choosen for stability and resistance to moisture.
This picture shows the plywood part for body of the wagon.
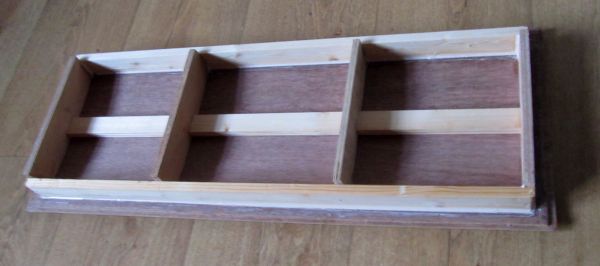
 The plywood is nailed and glued with epoxy filaments to form a rigid box.
The picture shows the trail fit of the body.
The plywood is nailed and glued with epoxy filaments to form a rigid box.
The picture shows the trail fit of the body.
 Then the roof was made using 3mm extrerior ply which was bend
in the required radius and fixed to a wooden frame which fits inside the wagon body
Then the roof was made using 3mm extrerior ply which was bend
in the required radius and fixed to a wooden frame which fits inside the wagon body
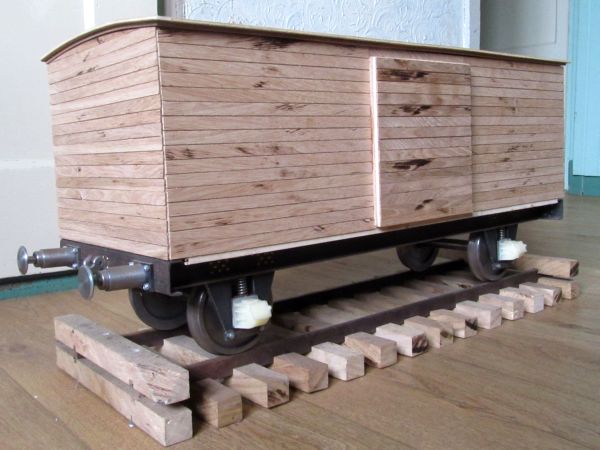 After preparing the main components the fun begins.
On my circular saw I cut some oak floorboards in little strips and glued them onto the plywood box.
To the left the result with the roof on top of the wagon body.
After preparing the main components the fun begins.
On my circular saw I cut some oak floorboards in little strips and glued them onto the plywood box.
To the left the result with the roof on top of the wagon body.
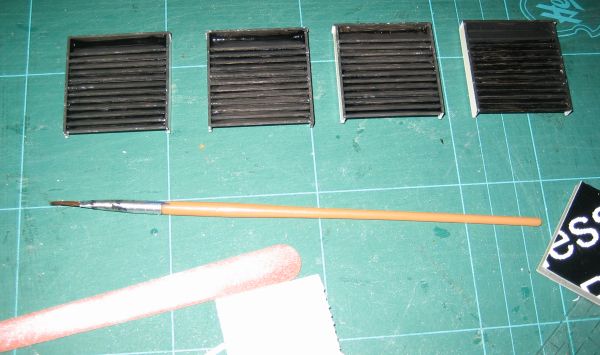 The ventilation grid is made by cutting strips outoff a 1mm thick plastic plate.
These strips are glued on a square piece of plastic plate and a square box is made around them to finish the ventilation grid.
These grids were painted with black matt enamel plastic paint before mounting.
The ventilation grid is made by cutting strips outoff a 1mm thick plastic plate.
These strips are glued on a square piece of plastic plate and a square box is made around them to finish the ventilation grid.
These grids were painted with black matt enamel plastic paint before mounting.
 The holes were carefully cut outoff the wagon body to be able to fit the ventilation grids.
The picture displays the wagon with a first paint of grey. No primer was used and the paint was put on thin so that the wood grain stays visible.
The top was painted with primer first and then painted with dark grey.
Some very fine sand was mixed with the paint to give it a more authentic look.
The holes were carefully cut outoff the wagon body to be able to fit the ventilation grids.
The picture displays the wagon with a first paint of grey. No primer was used and the paint was put on thin so that the wood grain stays visible.
The top was painted with primer first and then painted with dark grey.
Some very fine sand was mixed with the paint to give it a more authentic look.
Back to CHD part 5 of the build. or to the next chapter CHD part 7 of the build.
- www.schaalbouw.nl/projects © 2013 E.Paijmans
-

-

-
