Citroën maintenance blog, Xantia
Today I replaced the last section of the exhaust and repaired the speedometer.
The last section of the exhaust (the silencer) was badly rusted showing several holes on the outside of the silencer section. I did replace it by opening the clamp and taking the silencer outof its 3 mounting rubbers. The new exhaust was fitted and a new clamp was used (in combination with some exhaust cement) to fasten the exhaust. To easily put the mounting rubbers in place, some white petrol (or grease) can be used. Time of this repair approximatrly half an hour.
(UPDATED) The speedometer of the car did not work properly anymore. The km counter was reliably couting where the speedometer sometimes was stuck around 60 to 70km and at other times it dropped back to zero. This seems to happen frequently with the Xantia cars. The problem is that due to mechanical vibrations the solder around the pins holding the speedometer gets cracked. In order to fix this the instrument panel has to be removed and the pins have to be resoldered. If the speedometer is not working properly AND the km counter is not counting properly, the 'transducer' signalling the speed is probably faulty. This is discussed in the article hereafter.
Start with deactivating and removing the airbag (if any).
Remove the ignition key, remove the - lead from the accu and wait 10 minutes to deactivate the airbag.
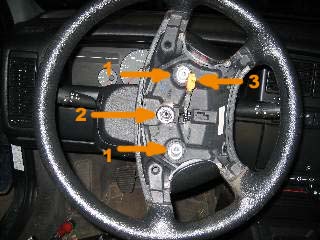
Losen the 2 torx screws from behind the steeringwheel (1) and losen the airbag. Remove the orange connector from the back of the airback and take the airbag out.
Remove the central nut from the steering wheel and pull the steering wheel off while guiding the airbag wiring through the hole of the steering wheel.
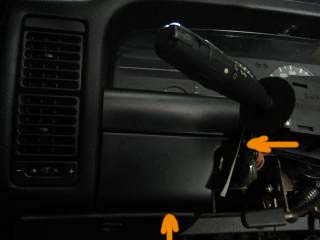
Remove the 2 torx that hold the steering column in place and remove the 2 plastic parts.
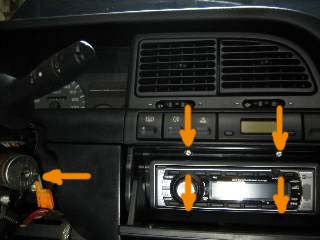
Remove the screw on the right of the steering wheel holding the orange connector. You can leave the screws around the radio in place.
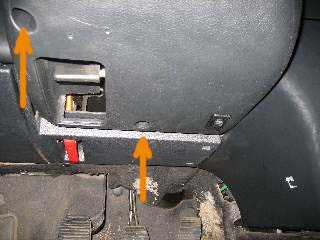
open the fusebox and remove the screw in the top right corner. Also remove the screw on the left of the steering column. Remove the plastic panel below the instruments.
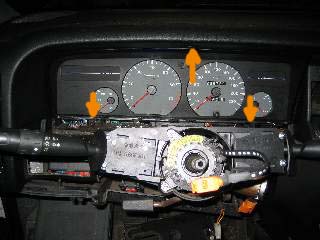
Remove the two bottom screws and the top screw which hold the instrument panel
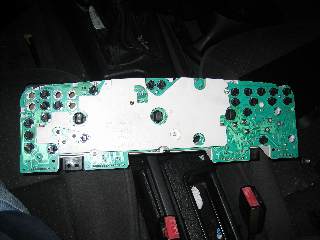
Remove the white cover located over the back of the instrument panel.
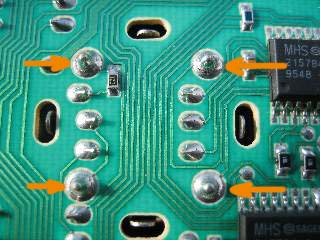
at the back of the speedometer you can see this section of the PCB. The 4 arrows indicate the pins which need to be soldered
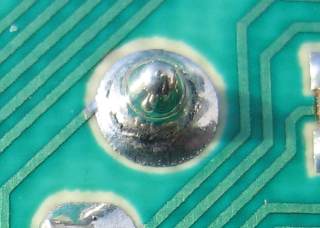
This phote shows a close-up of the pin with the cracked solder. Solder the 4 pins and put it all together again.
Total time of the repair approximately 3 hours
WARNING The last part of rebuilding the dashboard is putting the airbag in place. In order to activate the airbag, take care that no-one is in the car and no object are around the airbag. Remove the ignition key, and reconnect the - battery lead. Insert the ignition key and turn the ignition key while taking care not to come near the airbag. If all is well the airbag warning lamp should light for about 3 seconds.
- www.schaalbouw.nl/citroen © 2014 E.Paijmans
-

-

-

-

-

-

-

-
